
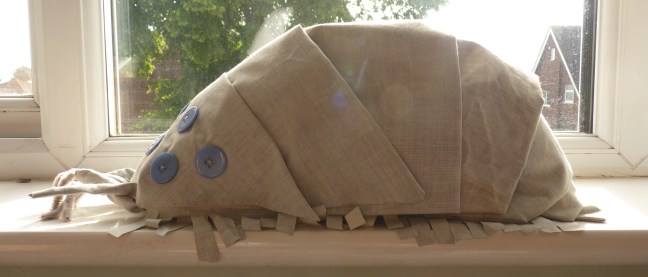
So several years ago I decided that I was going to go as Nausicaa of the Valley of the Wind to a costume party and as part of that I made a (happy) baby Ohmu to accompany me. It was a while ago and so I never took photos of the steps as I was building him at the time, thinking only of the finished thing. However, I recently bought the COMPLETE BOXSET OF THE BOOKS!! … Sorry, I got a little excited there… Anyway, it reminded me of when I made my Ohmu and so I have decided to share with everyone the steps I took to make him. Hope you enjoy and please feel free to share any ohmu you make, problems you have etc, in the comments below!
EQUIPMENT & MATERIALS
- Blue or red buttons (depending on whether you want an happy or angry Ohmu)
- Grey fabric
- Stuffing or beans
- Grey pipe cleaners
- Grey thread
- (fabric glue)
NOTE: I did not own a sewing machine at the time of making him so all of stitching was done by hand, therefore I have not accommodated for ease of machine sewing when designing.
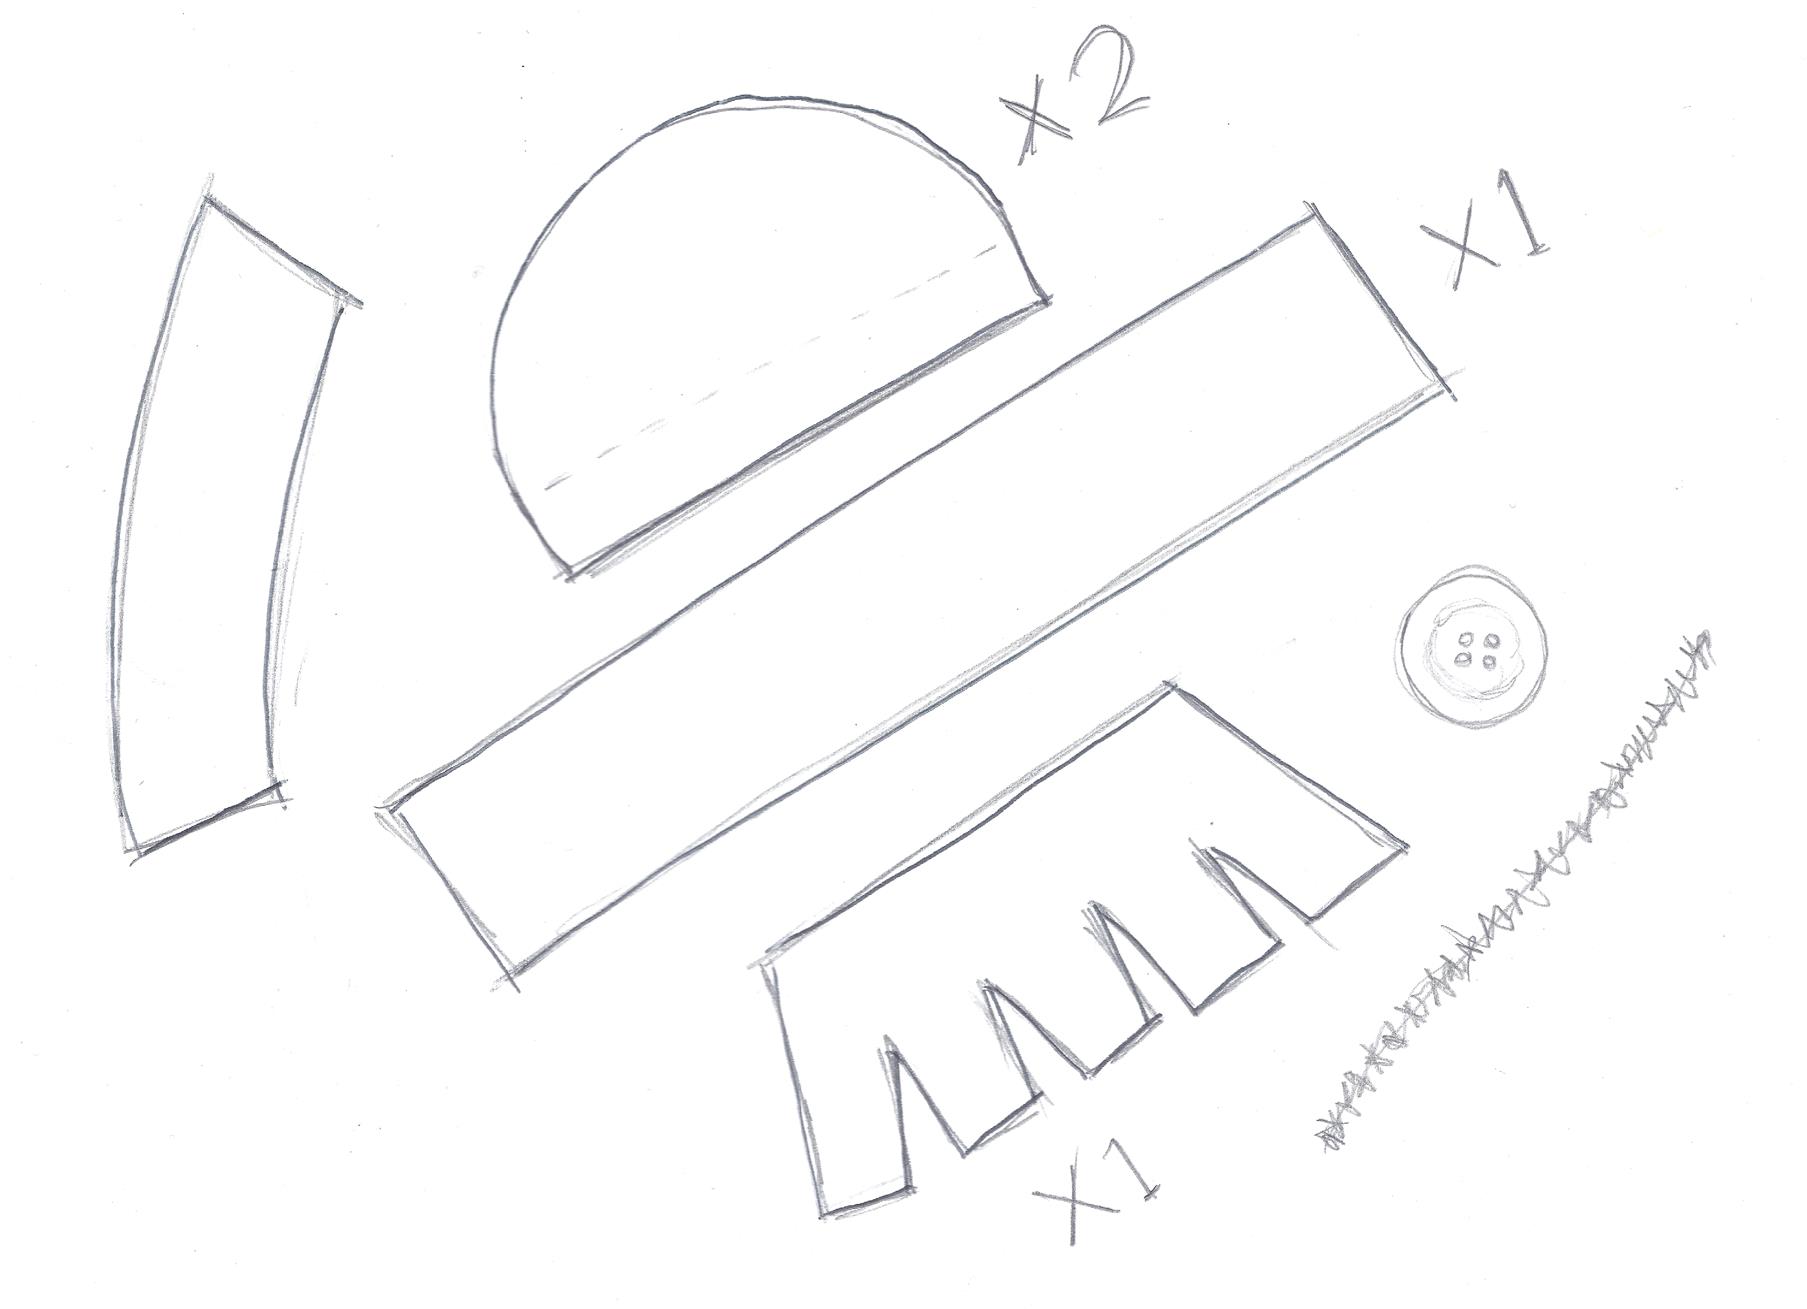
1. Firstly cut out the basic shape to hold the stuffing or beans (I used stuffing because it is cheaper) – this consists of the 2 sides and then one long piece for the middle of it. Stitch the sides all the way around but making sure you leave extra overhanging fabric on the inside of the two sides to be cut for the legs.
2. Turn inside out, stuff and and tack up but don’t stitch up the two ends of the long piece yet.

2. Cut the overhanging sides to make all the little side legs. I used a fabric that was more or less the same on both sides and doesn’t fray very easily so I was happy to leave mine like that obviously if you have the time you could stitch along the edges of all the legs to neaten them up.

4. Cut out all the pieces for the scales. I haven’t made very many for this particular Ohmu but you could make as many as you like. Remember though that the more that you make, the more layers you will build up and so the more rigid the shell will feel – this could be good for a more “shell” type effect but bad if you are trying to make the Ohmu more cuddly.
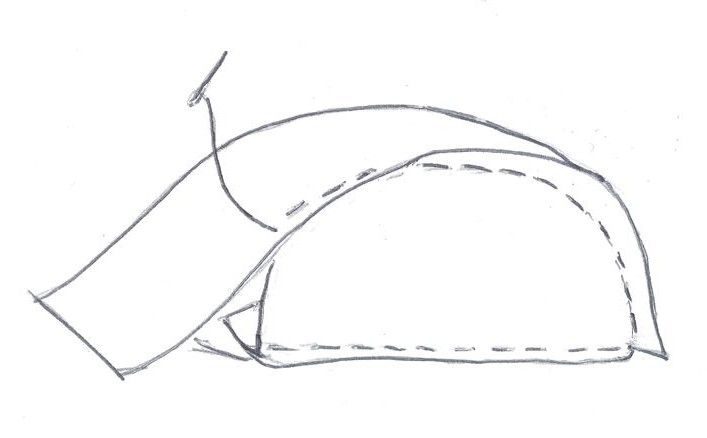
5. Fold the piece nearest the tail end of the Ohmu in half lengthways and stitch along the length where the two sides meet around the stuffed body piece as shown in the diagram .
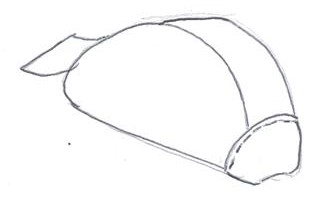
6. Repeat 5 with each of the shell pieces, each further along the body until you get to the last, face piece.
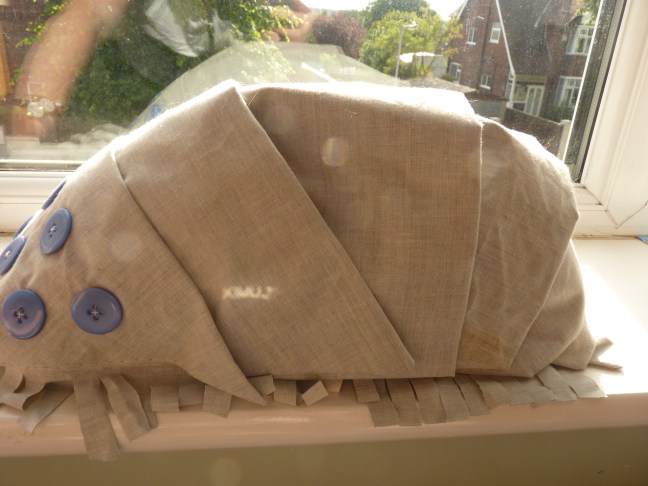
7. Stitch the underside end of the face piece to the body, fold it over but do not stitch the top side yet.
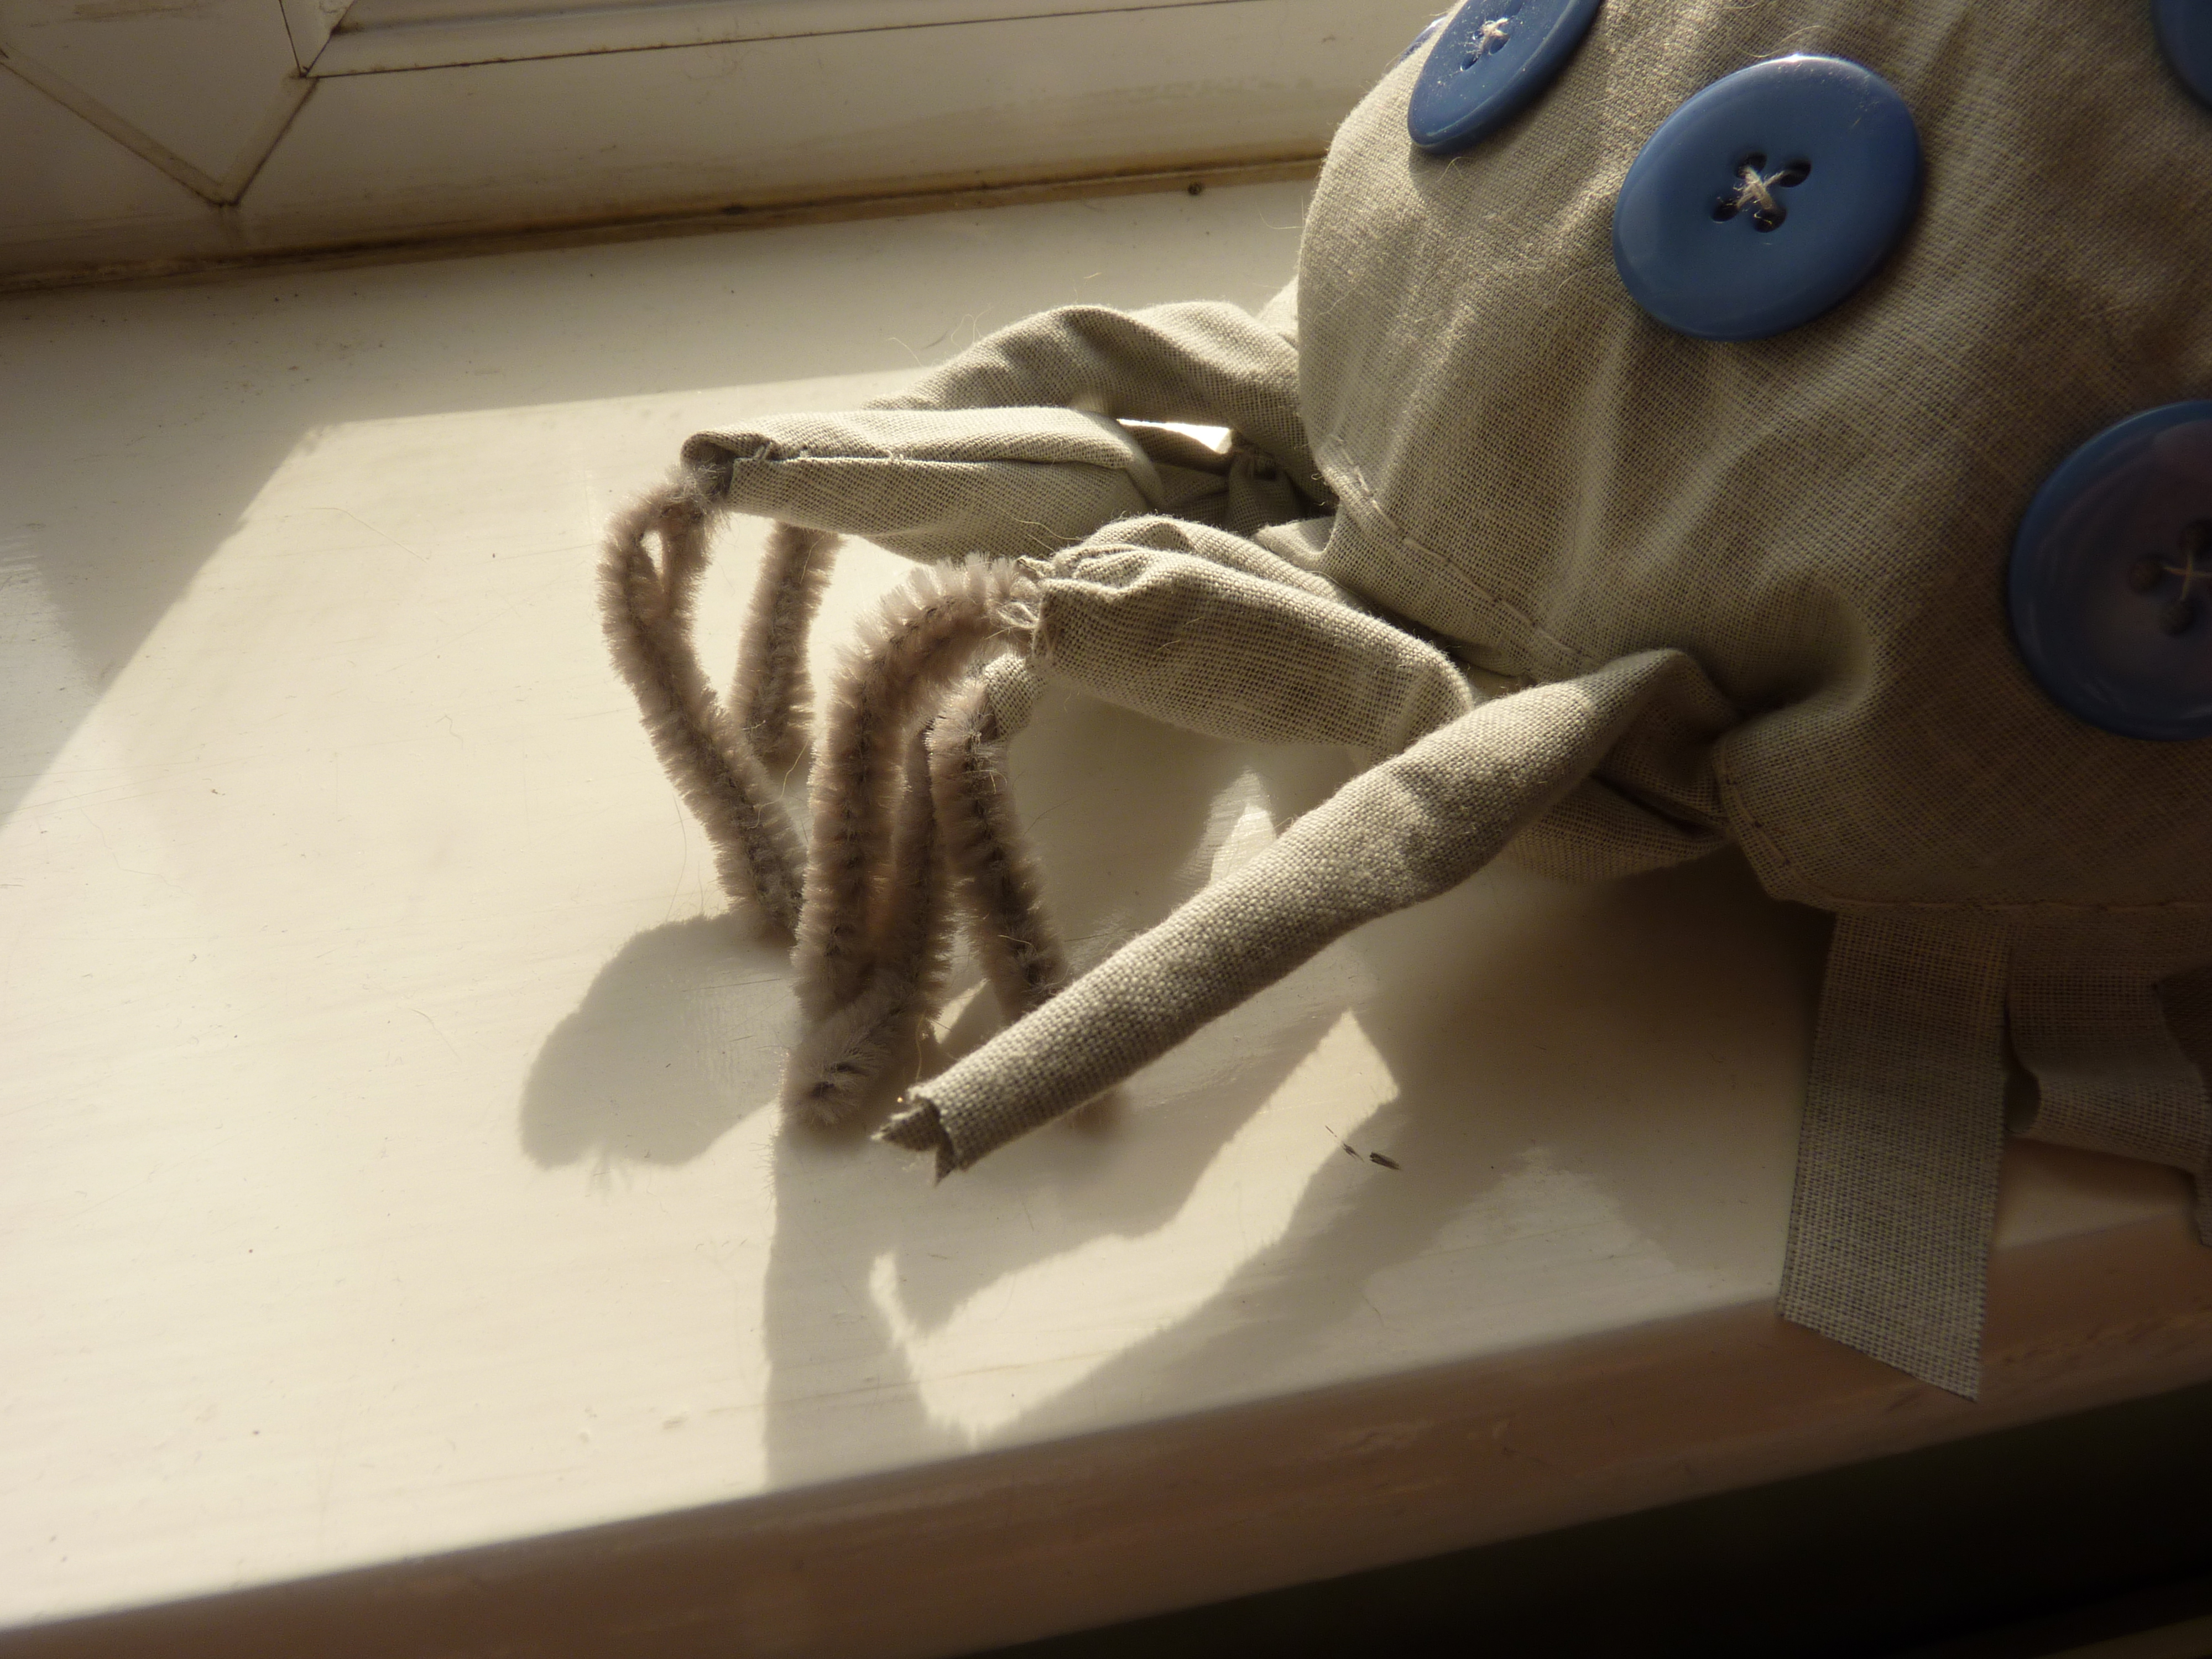
8. Cut the pipe cleaner into lengths of about 15cm ( inches), fold them in half and twist each of them tightly so they look like thicker pipe cleaners but with one rounded end and one end with both the sharp points.
9. Cut the piece as shown in the diagram. Fold each of the fingers in half and stitch along the side, but not the end, and then turn them all inside out to make a row of little rolled legs. Make sure that they are all stitched on the same side as shown in the diagram.

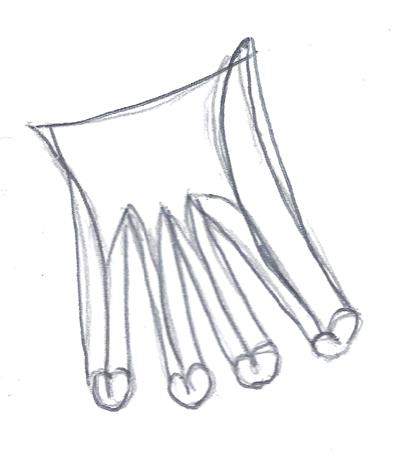
10. Push each of the pipe cleaners into each of the rolled legs, with the sharp ends pushed through towards the bade base of the legs. The fabric should roll in on itself a bit and hold the pipe cleaners tight. If you think that any of them are still quite loose then you can glue the sharp ends with some fabric glue on the underside.
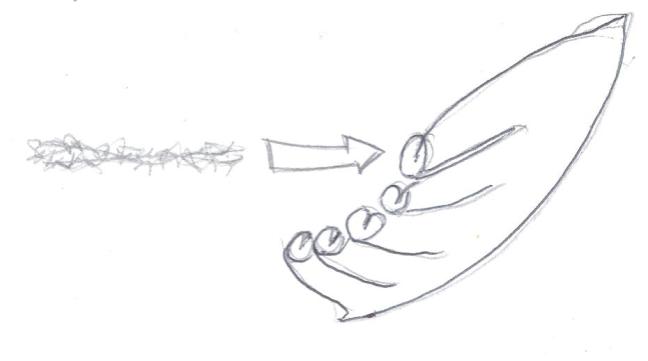

11. Fold the long side of the piece of fabric over and stitch along the edges, leave a gap and put a little bit of stuffing into the legs then finish stitching.

12. Remove the tacking ‘in the mouth’ of the Ohmu that you did in step 2 and put the pipe cleaners piece in. Sew the front end of the face scale piece to the end of the body piece and the pipe cleaners piece in one row of neat stitching.

13. Sew the bottom of the pipe cleaners piece to the bottom of the main body piece to seal it up.
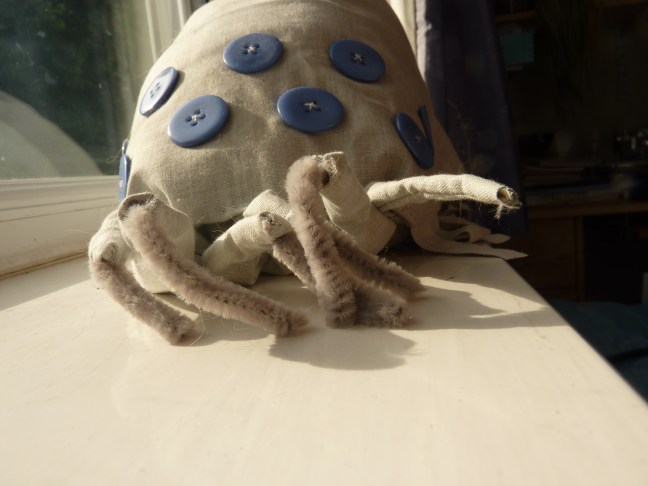
14. Sew the button eyes on in rows to the front face piece – you could probably glue raised jewel pieces for more Ohmu-like eyes but I like the stylised effect of using buttons.
15. Enjoy your new little Ohmu!
