


Background
One of my brothers used to always insist on going to the Duxford Imperial War Museum for his birthday every year to see all the planes he loved so much, and I think it must have been there somewhere maybe that I saw it first – a craft commonly practised by those hiding away in their bomb shelters during the Blitzing of Britain and so presumably displayed or described somewhere in the general World War 2 section of the hangars. Making a rag rug. They can be extraordinarily pretty looking things and sound incredibly easy to make – no sewing or gluing. Ideal craft project.
So way back when in the beginning of 2015 when I had just learned that I was going to have to take an interruption of studies from my degree, I realised that I would actually finally have the time to get around to making one. And it would make the perfect present for my sister’s birthday later that year!
Now you see what I actually hadn’t realised before was the reason why rag rugs aren’t exactly a more popular craft considering the simplicity of the actually manufacturing process – time. You need lots of it. No seriously, when I had googled information and advice whilst assembling the bits and pieces for mine I had seen several warnings telling me exactly that but I didn’t actually listen so please, if you are looking at this blog post now with the vague ideal of making one, actually pay attention and gather yourself together a lot of time.
Introduction
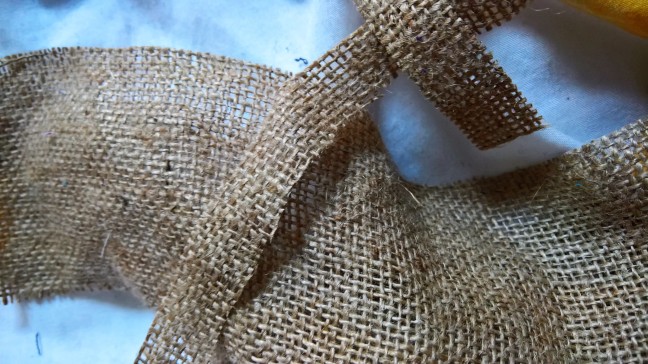
The way they traditionally work is by getting a load of hessian (old sack material – obviously once in plentiful supply of old when sacks were all over the place, but I just ordered myself a big roll of it online), and all the soft, cotton, polyester or similar, materials and fabrics in the colours you are looking to use.

Here is a subject of some controversy, as googling had led me to discover that some people like to buy whole kits with pre-cut plastic equivalent to hessian, and rags ready to assemble a picture across the rug in specific colours. Now, I’m not a particularly big fan of this, largely because I don’t actually generally like “pre-made” kits like that because they’re a little boring to simply plod out an identical product to everyone else, but also because I personally think that the innately lumpy, messy nature of rag rugs do not lend themselves well to adding enough detail to make clear images that don’t quickly relapse into some kind of animal uncanny valley and just look Professor Umbridge style of overly cute kitsch and creepy. Some people like them though so please, go ahead if you will, but just look up very carefully the results of other people’s efforts and consider that if you are going to dedicate so much of your life to this project do you want it to be something like that?
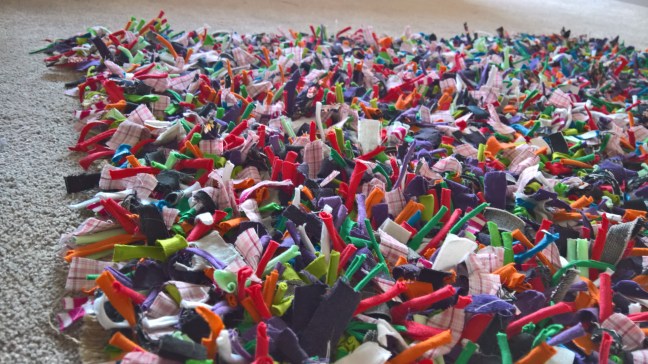
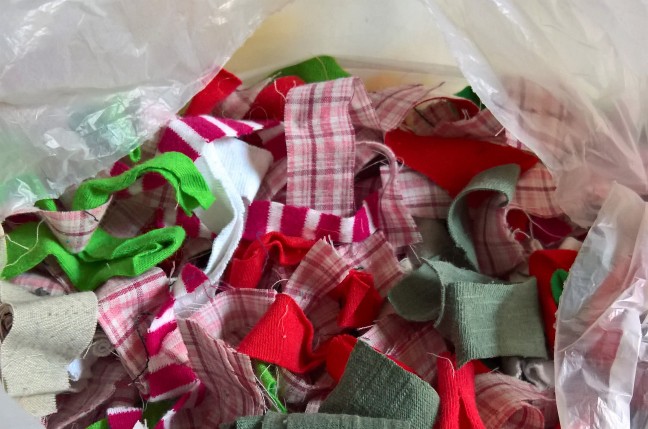
For myself, I went for the actually classic tactic of cutting the rags out of old, otherwise to be thrown away clothes and other fabrics. Well, ideally so anyway. In practice this meant initially a few old socks, some old pyjamas and a couple of pairs of trousers with holes too big to repair any longer, and then asking friends for their similar contributions. After I’d collected a load of wonderful odds and ends I did realise that the resulting colour contributions were not exactly right and felt lacking in something slightly brighter or complimenting to the mix so I went to one of my favourite local charity shops and got a load of clothes in the missing colours out of their reduced to clear 50p sale bucket. So a little bit of cheating but oh well. In my nostalgic blurred memory of WW2 rag rugs they actually looked nothing like this collection because presumably they only actually cut everything up if it had absolutely no other possible purpose in the time of rationing so only incredibly dark, browns and blacks and very natural colours were involved. No UV bright white t-shirts involved there.
Anyway so here’s what I did eventually:
Instructions
- Hessian to make the base of the rug
- Material to be cut into rags to make the bulk of the rug
- Hook tool – something like this one on Amazon (that’s my one actually), only needs to be really basic, nothing special.
1. Cut the rags – strips of fabric approximately 50mm length and 20mm width.
Very approximately in my case because the unevenness creates more of that ruffled effect I quite liked, but I very quickly learned that some fabrics:
- …naturally curled up and just looked like string, completely disappearing in the mix, if they were cut too thinly and so needed thicker cuts. Look out for stretchy t-shirts.
- …were way too stiff to curl into the loop in the hessian unless cut really thinly.
- …frayed too much when cut up and then looped to be used
- …frayed a lot when initially cut but after picking all the fluff away was actually fine and shed no longer once looped into the rug.

The whole process of cutting was largely done by me whilst watching loads of film and television as I found it reassuringly easy to do whilst watching things and so could feel productive with my time doubling up on my use of it. Mostly while watching Breaking Bad, Community, and early seasons of Archer on Netflix if you were interested.
However, I must warn you if you do not realise this already – cutting loads of different fabrics is incredibly messy. Yes it is all dry material but the fluff falling off it all accumulates incredibly quickly when the ratio of cut edges to clean bulk material is increased to such dramatic proportions of hundreds of small rags like that. Requires lots of frequent hoovering following a session.
2. Loop the rags.
The process of hooking a rag goes like this:
a. Push the hook tool through a loop of the hessian, making sure the latch goes all the way through to the other side of it. I generally passed through two threads at a time in case one thread snapped.
b. Let the latch fall open whilst on the other side of the hessian string and fold the rag approximately in half around the underside of the hook (the curved outer edge of the hook shape) on the handle side of the hessian loop.
c. Fold the two ends of the rag over each other inside the hook and flick the latch closed on top of them.
d. Pull the hook tool back through the loop of hessian and open the latch.
Ta da!
3. Space the rags.
So then the question becomes one of spacing where you hook them. This depends on several things, and I hadn’t quite appreciated it when I began.
Firstly, it depends of the tightness of your hessian as to how tightly packed together the rags can be without starting to loosen and unravel the hessian weave.
Secondly, the density of rags influences hugely the feeling of the rug when it’s finished. Thirdly, how much time you have and how big you want the rug to be.
When I started I was spacing the rags a couple of threads of hessian apart from each other. This proved a little problematic when working near cut and fraying edges of the hessian as it pulled in and made huge, loose loops of the thread to fit the tool through and wasn’t tight enough around the rag alone to hold it in place.
Additionally, it was taking a really long time to fill in a really small space. I had originally hoped for a rug approximately 2m long (hahahaha, didn’t happen) and quickly realised I needed to go quicker to achieve this.
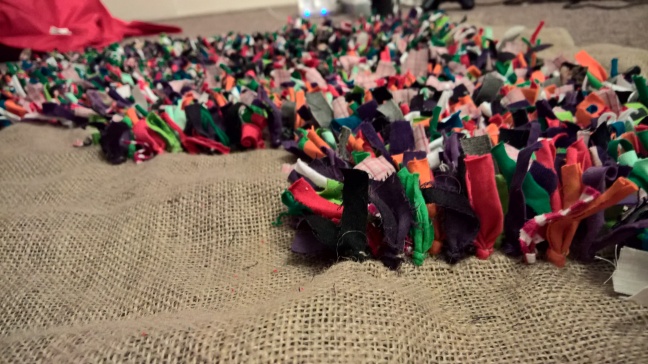
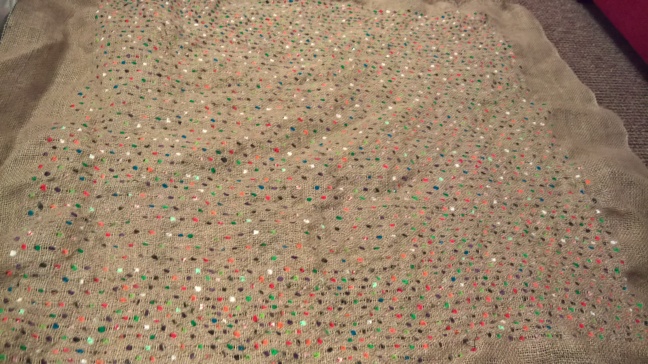
However, when I then started spacing them 4 or 5 threads apart I found that although visually you still couldn’t see the hessian through the rags, when I actually put my hands of that section of the rug, or indeed put it on the floor and walked on it, there was actually a huge difference to the denser section. The denser section was soft because I was walking on the loose ends of the rags, but the sparser section was not because I could feel myself walking on all the knots, clearly not sufficiently buried underneath all the loose ends.
So although I had indeed increased my rate of covering, it was very much a false economy as I had to go back and start trying to fill in the gaps I could see from the underside of the rug, which was more difficult and time consuming than just hooking the denser rags.


You can see the difference in densities from the underside of the rug in the photos above.
If you’re only making the rug for visual purposes then you should be fine, but otherwise don’t make the same mistake I did and just accept that for it to be worthwhile, it will have to take the longer time with the higher density of rags.
4. Seal the edges of the hessian.
So after nearly 2 years of hooking (mostly on my interruption, then when I returned to university and had considerably less time it obviously took me even longer to make progress), watching Eurovision, the remainder of all seasons so far of breaking Bad, Community, Archer, and then all of Orange is the New Black, and 2 other American seasons, and at least 5 films, I finally reached dimensions of …. which I decided were good enough.
I had seen several suggestions online for different ways of sealing hessian but after experimenting with spare pieces of mine, I wasn’t greatly satisfied with one individually and so chose to go with two together – stitching and gluing.


I stitched with a thick gold thread that would be strong enough to hold the hessian tight, relative to the hessian thread size. The path I stitched needed to be as close to the edges of the ragging or tension would be lost in the hessian threads.
Then I used super glue (it took a while to find ones suitable for the material) parallel to the outside of the thread just in case.


5. Cut away excess hessian.
And so there it was! Finally finished!


I left it in my sister’s bedroom, wary that recent redecoration meant that it doesn’t exactly blend in with the decor but she told me she was happy with it. Hooray!

Wonderful ideas, really love the finished product. Thanks a lot for sharing this post with us, really helpful. Great blog.
LikeLike
that was very helpful
LikeLike
Hello, love these rag rug instructions! I am writing a life story for a 93 year old lady who used to make rag rugs as a child. As her family had no camera at the time she would love to include one of your photos in her book…would that be possible, please? The book is not for sale, just a few copies as gifts for family and close friends and I would include a credit with the photo. I look forward to your response. Kind regards, Jenny
LikeLike
Hi that sounds lovely! Yes, I am happy for you to use the photos in this context, and hope everyone enjoys the book.
LikeLike
Thank you so much for permission to use a photo, My lady is very excited about her forthcoming book.
LikeLike